Integrating printers in a restaurant or bar’s workflow can enhance communication and collaboration between the front-of-house and back-of-house teams, leading to a more streamlined and efficient service.
Enable and create printers
To enable sending orders to a kitchen or bar printer:
- go to Point of Sale ‣ Configuration ‣ Settings;
- scroll down to the Connected Devices section;
- enable Preparation Printers.
To get a list of all the printers already created or to modify an already created printer, click
–> Printers and click 'New' to open the setup form.
Additional kitchen printer settings
There are a few additional settings for the kitchen printer:
- go to Point of Sale ‣ Configuration ‣ Settings;
- scroll down to the Connected Devices section.
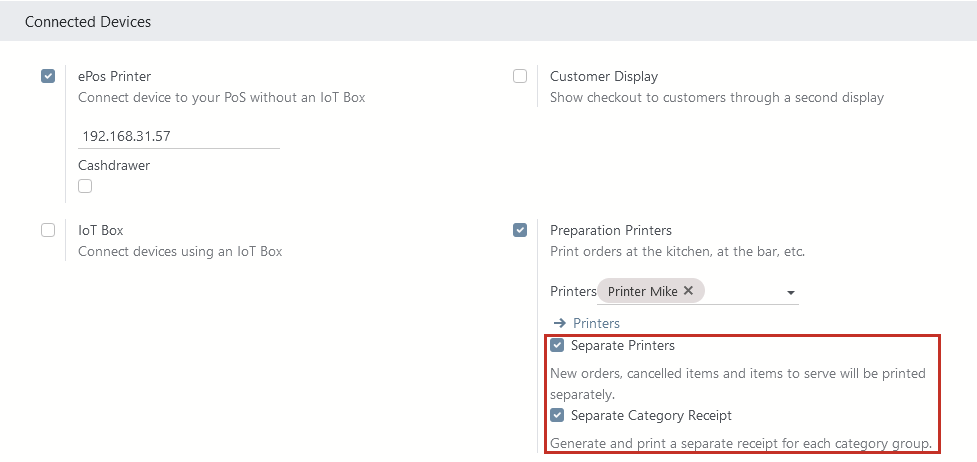
Activating the 'Separate Receipt' checkbox - new orders, items to serve, and canceled items will be printed separately.
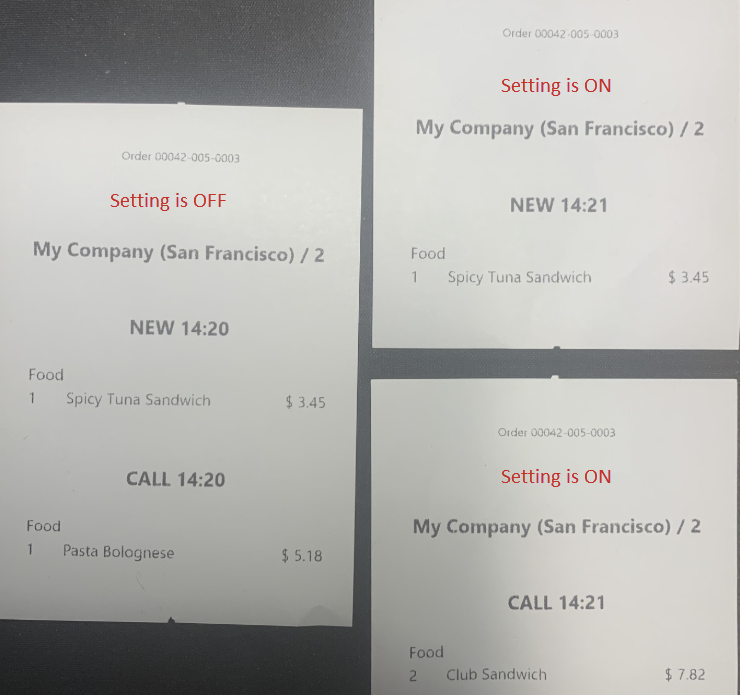
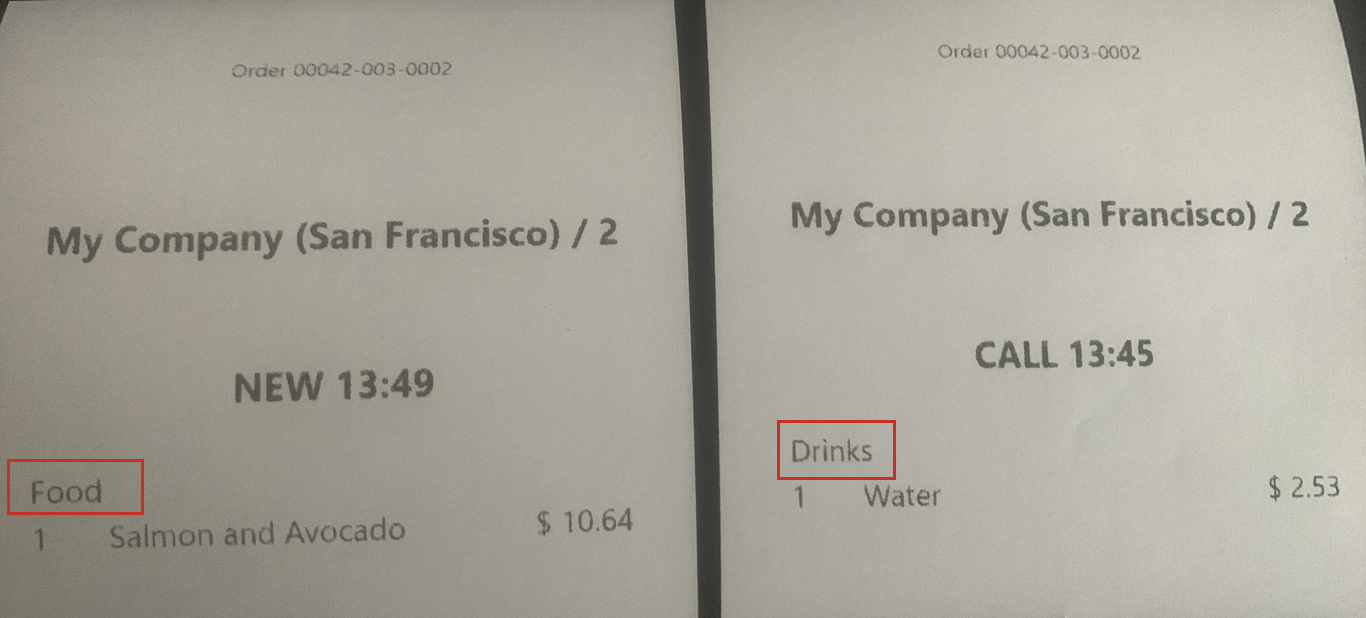
Activating the 'Separate Receipt per Category' leads to printing all items related to the same PoS product category in a separate kitchen receipt.
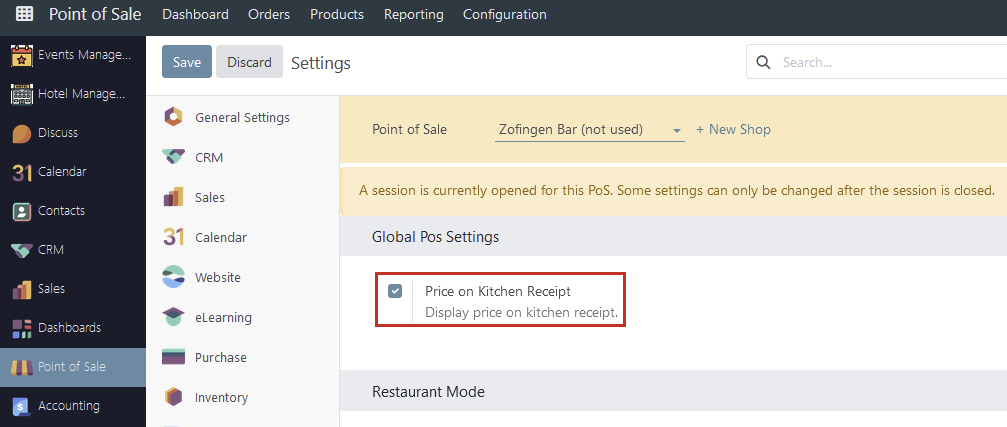
In addition, there is a setting that if active will show the unit price of a specific item on the kitchen printed checks:
- go to Point of Sale;
- Configuration ‣ Settings;
- make the checkbox active for 'Price on Kitchen Receipt' in the 'Global Pos Settings' section.
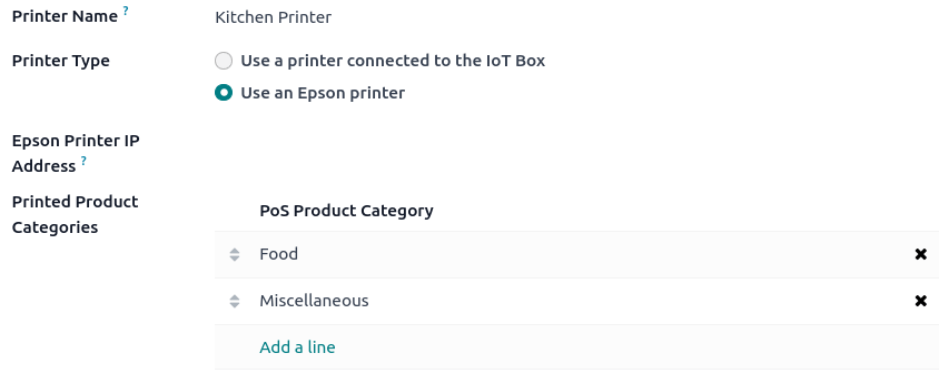
Setup form
From the setup form, select the Printer Type according to your installation:
- If your printer is connected to an IoT box, select 'Use a printer connected to the IoT Box' and select the device in the IoT Device field.
- If you use an Epson printer that does not need an IoT box, select Use an Epson printer and enter the printer’s IP address in the Epson Printer IP Address field.
Set your printer to print specific products based on their PoS category. To do so, click 'Add a line' in the 'Printed Product Categories' field. If you leave this field empty, all products are sent to the printer regardless of their POS category.
Print Orders
After making the necessary settings, the following steps are:
- open a new session or continue selling in an opened one;
- choose any available table;
- add a few items to an order;
- click the 'Order' in the bottom left corner;
- choose specific items to be served by double-clicking on each item;
- click the 'Serve' button.
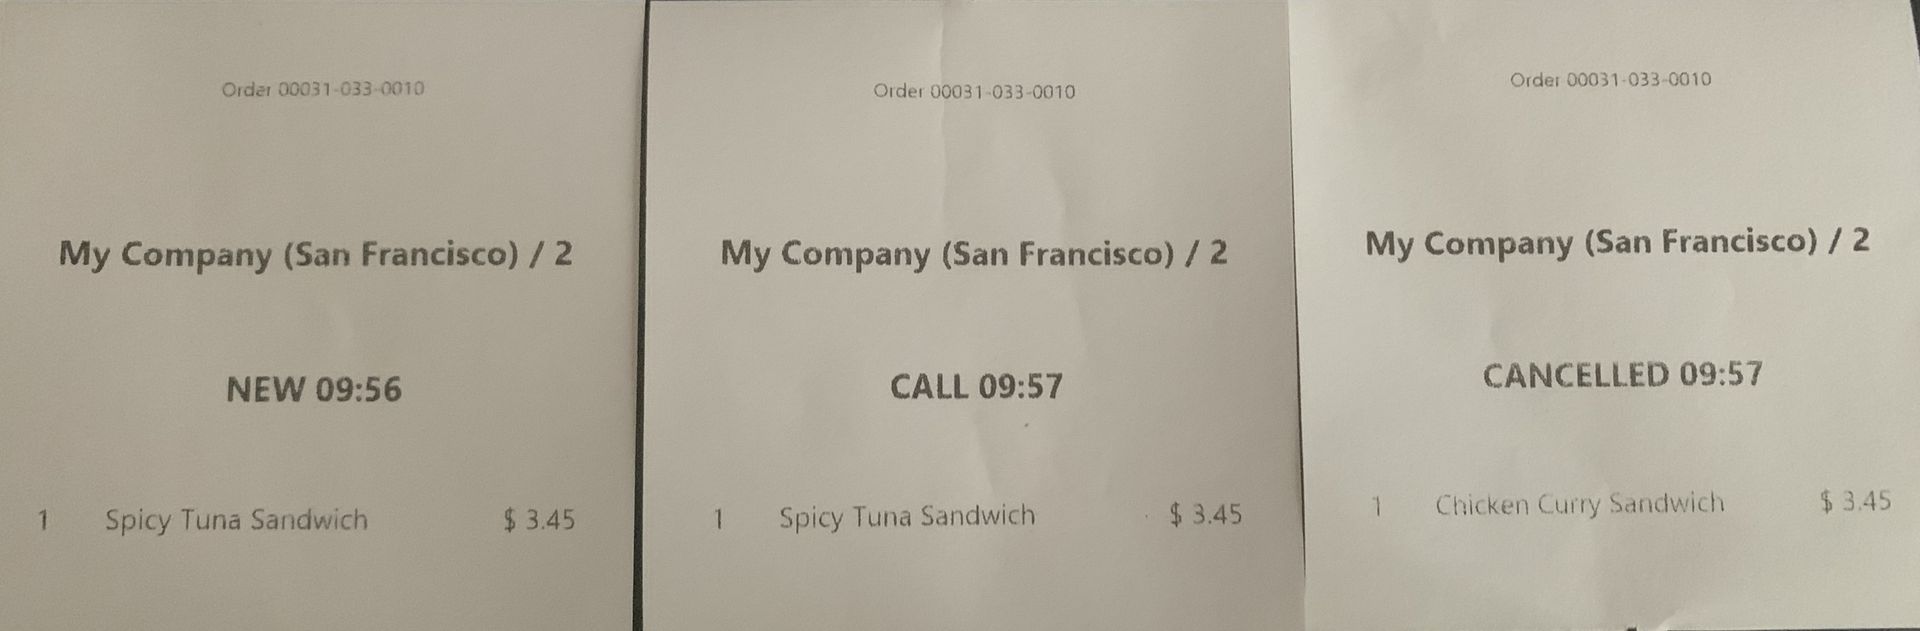
Each order item can be canceled, and the kitchen/bar will receive a printed check with a new section titled 'Cancelled'.

Example of kitchen printed receipt
The structure of the kitchen check is the following:
- on the top of the check, the system prints an order number;
- after this it shows a PoS name and table number;
- below is a status - New, Call or Cancelled with time;
- ultimately, it is an item with its quantity and unit price.
There are no comments for now.
to be the first to leave a comment.