Start the group split process
After the group reservation is confirmed, the next step for the user is to complete the split of the group. To start the process, the user has to click the 'Split Reservation' button in the top button bar - the split window will appear.

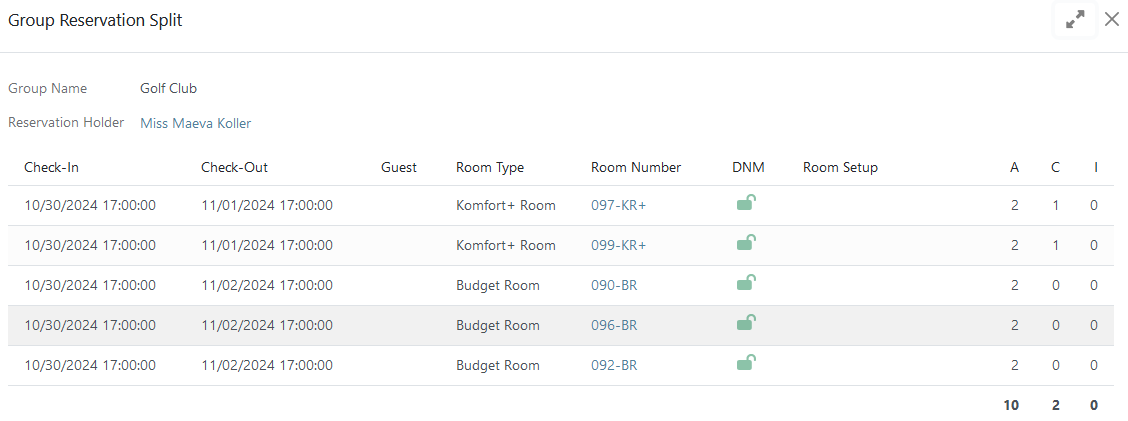
On the top, there are two read-only fields - 'Group Name' and 'Reservation Holder', values for which were defined in the reservation mask. The main information has to be defined in the split table:
- Check-In and Check-Out - non-editable values in these fields are prefilled in from the group room line in the reservation mask;
- Guest - assign a guest name to each room within the group;
- Room Type - non-editable value in this field is prefilled in from the group room line;
- Room Number - the system selects the best available room numbers of this room type for current dates, but the user can change it;
- Room Setup - the user can indicate a room setup for a specific room number, like twin (2 separate beds) or double (1 king-size bed);
- DNM (Do Not Move room) - the user can activate this option if one or more room numbers need to be assigned to a specific guest(s);
- A/C/I - number of guests in each room.
Download/Upload group information file
Managing guest assignments in group reservations can sometimes feel overwhelming. To make this process easier and more enjoyable, our system allows you to simply upload a file with all the necessary guest details. This convenient feature helps you complete guest assignments quickly and efficiently, ensuring a smooth and stress-free experience for users.
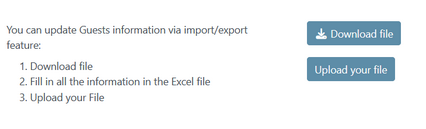
The user can complete this process in three simple steps:
- click the 'Download File' button - the system generates an Excel file titled with the group reservation number;
- in this file the user has to assign guests to certain rooms and provide some contact information (phone number or email);

- click the 'Upload File' button - the information from the uploaded file was assigned to specific fields in the group split table.
Buttons in the split wizard
At the bottom of the group split window, there are the following buttons:
- Save Changes for Later - if the user is interrupted during the split process, they can save the progress made and return to complete it at a later time;
- Revert All Changes - allows the user to start the group split process from scratch;
- Split - once all the required fields in the group split table have been filled out, by clicking this button, the system will split the reservation into individual guest reservations linked to the main group reservation.
- Discard - close the group split window without saving any changes that were made.

Completed Split
Once the split is done:
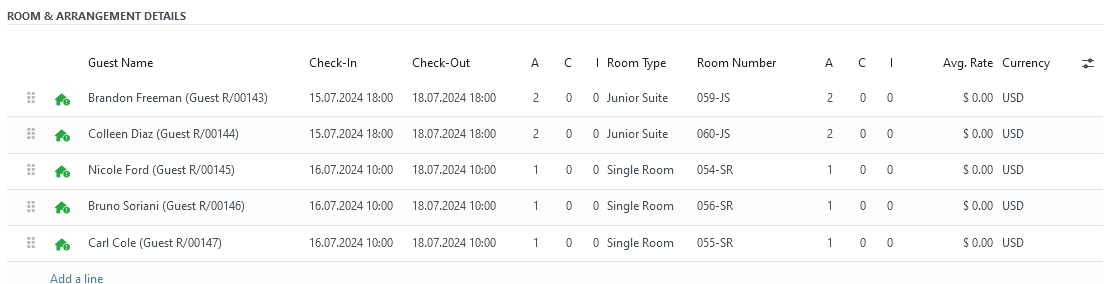
- the system shows each guest reservation separately on the group reservation level as a separate line;
- on the top right new smart buttons be available - 'Group Reservation' will redirect the user to the group reservation page and 'Guest Reservations' (with the total quantity of the room in the certain group reservation) will redirect the user to the list of all guest reservations;

- in the group reservation overview, the system will show the total amount of the same items (room, arrangement, city tax, etc) as one row.
Revert Split
There are cases when need to make significant adjustments to the group reservation, for example, the number of rooms for different dates, or the total number of people has changed significantly, add/remove packages, etc. The corresponding changes are easier to make at the reservation level before the split - for this purpose, the revert split functionality is available. The 'Revert Split' button will be available if the following points are met:
- at least one room line is split;
- group reservation status is 'Confirmed';
- all guest reservations are in the 'Confirmed' or 'Canceled' status;
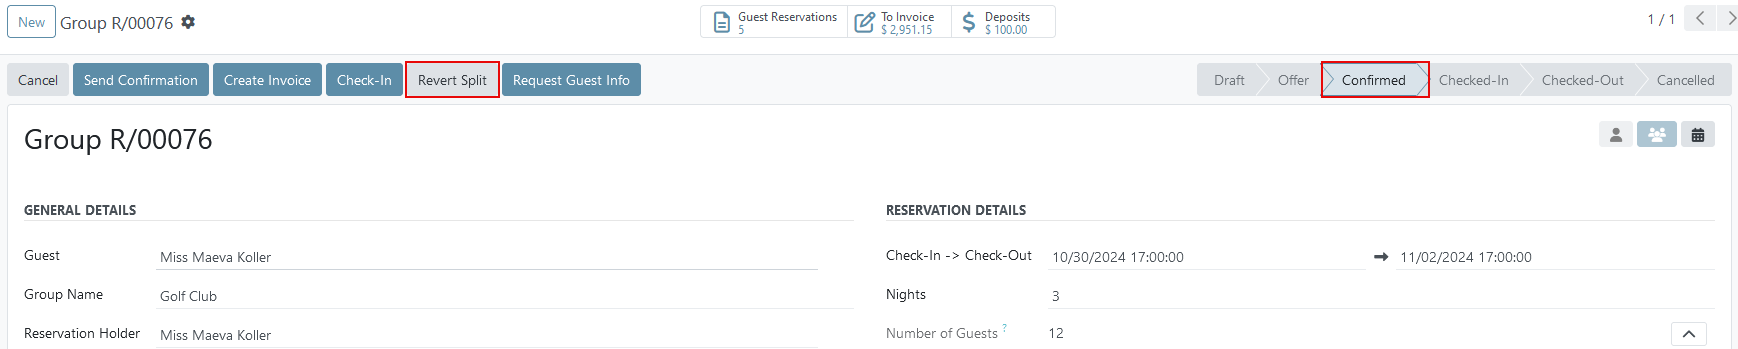
Provided the conditions mentioned are met, the 'Revert Split' button will be displayed on the group reservation page. To complete the 'Revert Split' procedure, follow these steps:
- in the group reservation click 'Revert Split';
- confirm your choice.
Once the revert is done, the system:
- deletes all guest reservations;
- shows only master room lines;
- tracks changes in the chatter.
Add extra room(s) after the split was done
If, after the split has been made, you need to add one or more rooms to the current group, you need to follow a few simple steps:
- open existing split group reservation;
- in the 'Room&Arrangement Details' section under the last room line click 'Add a line';
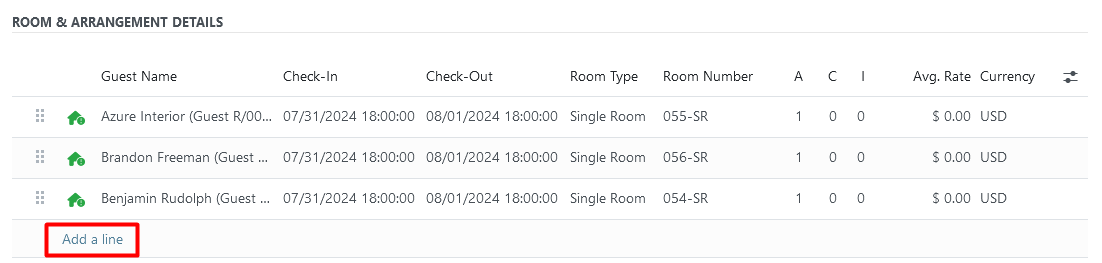
- add one or more rooms for selected dates for a specified number of guests and save changes;
- once an extra line was created, the 'Split Reservation' button is available again - just run the split again for the newly added room(s).
There are no comments for now.
to be the first to leave a comment.